Welcome Club Scrap Kit (April 2011) - Pages 16 and 17

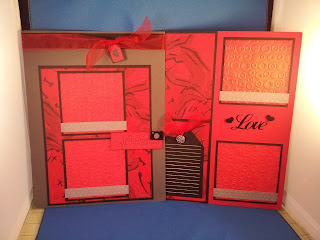
Here are pages 16 and 17 of the Welcome April 2011 Club Scrap kit.
Let's look below for more details about this layout.

Here is page one of the two page layout. I have a patterned cardstock set
behind the photo mats. The patterned cardstock is cut at 6 1/2" x 8 1/4"
 and it is mounted on black cardstock, which is cut at 6 3/4" x 8 1/2".

Here I took a shear red ribbon and wrapped it around the top of the layout .
I took a tag sticker that came with the kit, but I only used the silhouette and put
 it on red cardstock and cut around it then put a vinyl heart sticker in the center.
 I fed the ribbon through the hole in the tag and tied a knot. I set a black strip of paper behind the ribbon, so it would deepen the color of the ribbon.

I took a piece of red cardstock and stamped this sentiment using Fiskars
sentiments stamp set. I cut the cardstock to 3 1/4" x 1 1/4". I took a vinyl
camera sticker that came in the kit and put it on gray cardstock and set that
on top of the red cardstock next to the sentiment. I
have it popped up on one thickness of foam dimenstionals.

I have two photo mats on this page. They are double matted. The black
mat is cut at 4" x 4" and the red cardstock is cut at 3 3/4" x 3 3/4" and it will
fit a 3 1/2' X 3 1/2" photo. I embossed the top photo mat using the Cuttlebug folder
 Spots and Dots. I put some gray polka dot washi tape on the front of each photo mat.
Here is the second page of the two page layout.  I have a piece of black cardstock along the
left side of the page and then I have two small pieces of patterned cardstock layered on top.
The black cardstock is cut at 3 3/4" x 11" and the patterned cardstock is cut at 3 1/2" x 5 1/4".
I have two photo mats that are double matted. The bottom mat is cut at 4" x 4" and the top mat
that is embossed with the Spots and Dots Cuttlebug folder is cut at 3 3/4" x 3 3/4".
I have washi tape at the bottom of the photo mat. I will pick up the washi tape to get a photo underneath.
These are vinyl stickers that came in the kit. I set love down on the page in between the
two photo mats and then I took the two hearts and put them on some foam dimensionals.

This tag was a stencil. It measures 3" x 4 1/2". I took some more of
that red sheer ribbon and tied a knot in it through the hole in the tag
 and then attached a button using a glue dot.


Click below to view my YouTube video:


Comments

Popular posts from this blog

Child Powered Snow Plow Scrapbook Layout (November 2017 Hip Kit) Page 6

Aurora Borealis Club Scrap Kit (December 2011) - Pages 11 and 12

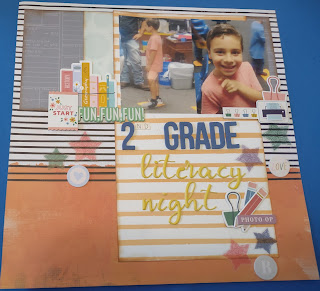
2nd Grade Literacy Night Scrapbook Layout (September 2021 Hip Kit) Page 7