Posts

Showing posts from June, 2014

Ninth Grade Scrapbook Layout (Boy)

Image
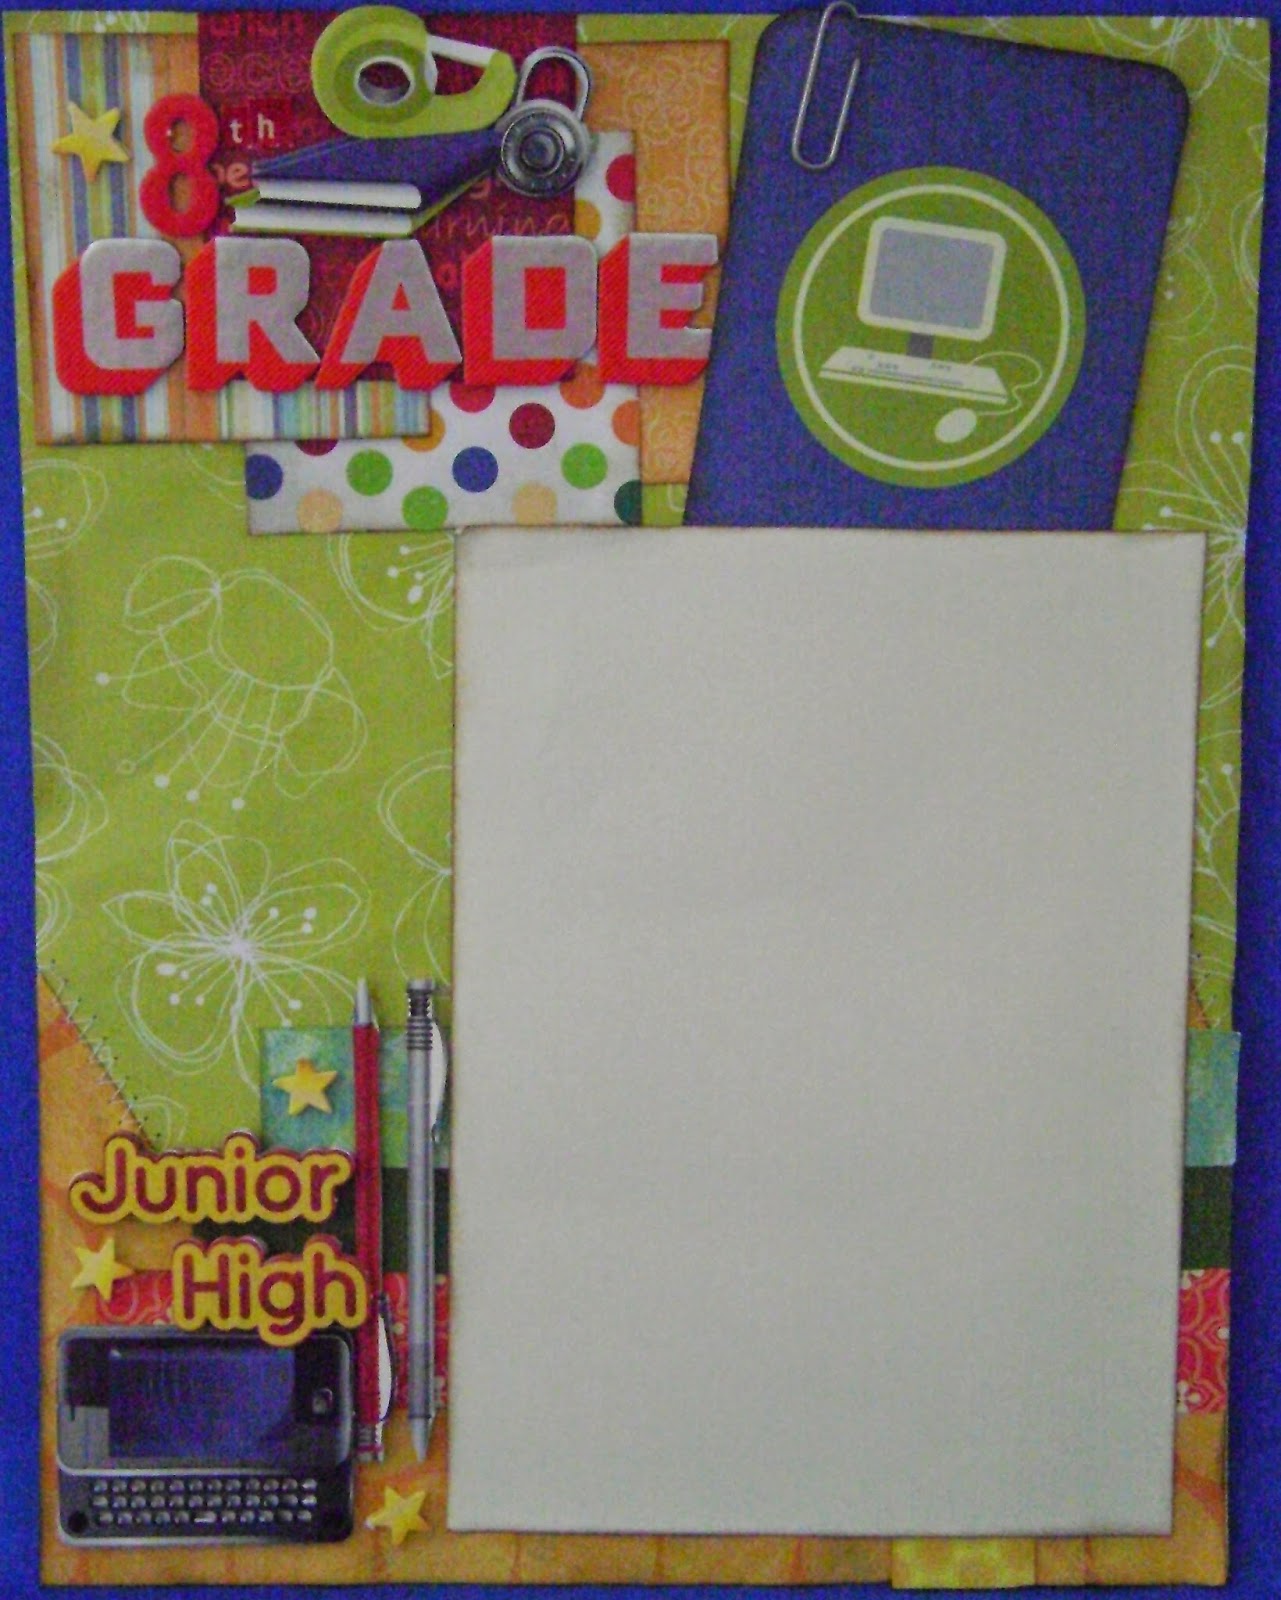
I made this ninth grade layout for my great nephew. I used Sketch N Scrap sketch #56 by Lisa Hidy. The paper is K Company. I cut the background down to 8 1/4" x 10 3/4", so I can mount it onto a dark gray cardstock. I have a red mesh pattern that is cut at 5 3/4" x 10 1/4", orange pattern is 8 1/4" x 3 1/2". Let's look below for more details about this layout. This cluster at the top right of the layout is done using Reminisce die cut stickers. The stars I made using my Silhouette. I filled the stars with an ombre effect to match the stars that came with the sticker sheets. I ran out, but wanted to continue to use stars. I put glossy accents over the stars to make them appear glossy like the stickers. I cut a small piece off a border strip to use here at the left side of the page. I scattered more stars around this small border strip. At the bottom left I have another cluster that is Reminisce die cut stickers. I used a sc

Eighth Grade Scrapbook Layout (Boy)

Image
Here is the eighth grade layout I made for my great nephew. I used 3 picture sketch for Imaginisce by Christine Meyer. I used K Company paper and a few scraps. I cut two triangles attached to one another and adhered to my background paper. I used my sewing machine to do a zig zag stitch around the triangles. You will see that in another photo. I have several layers in the left corner of the layout. Orange square is 3" x 3", the stripe and polka dot square is 2 3/4" x 2 3/4" and the red square is 2 1/2" x 2 1/2". I have three strips at the bottom of the layout. The yellow is 9 3/4" x 1", red is 8" x 1" and the green is 7 1/2" x 1". This title at the top left of the layout is made using several different letter fonts. The "8" is Apartment Thickers, "th" is Cosmo Cricket Tiny Type stickers, and "grade" is Josh Thickers. The rest of the stickers are Reminisce die cut stickers. I

Seventh Grade Scrapbook Layout (Boy)

Image
Here is the seventh grade layout I did for my great nephew. I used Creative Scrappers sketch #264 by Jenny Gevans. I used K Company and Second Wind Collection patterned papers. I used a dictionary print cut at 6 1/2" x 4 1/2", striped patterned layer is 2" x 6 1/2"and the floral pattern is 7 1/4" x 2 3/4". I used a border punch on the floral print. Here is the cluster at the bottom of the layout.  I used stickers from Reminisce die cut sticker sheet. This sticker sheet had red stars instead of yellow. The cluster in the top left are stickers from the Reminisce die cut sticker sheet. This photo mat is 5 1/4" x 7 1/4". I used a 4" x 6" school project life journaling card set behind the photo mat.  Click below to view my YouTube video:

Sixth Grade Scrapbook Layout (Boy)

Image
Here is a sixth grade layout I did for my great nephew. I used a Creative Scrappers sketch #260 by Kristine. I used a triangle mat cut with the Silhouette to make my background. I used a few paper layers. The light green honeycomb printed paper is 6" x 7 1/2", green printed paper is 7" x 3 3/4", and the red pattern is 3" x 10 3/4". Here is a look at my bottom cluster. I used a "school days are here" cut apart along with a row of three stars also cut apart from All Seasons II paper pad.  I used stickers from Reminisce die cut sticker sheet. This sticker sheet had blue start instead of yellow ones. Here is a look at a cluster of stickers in the top right corner of the photo mat. These stickers are also from Reminisce die cut sticker sheet. I also am using a school project life journaling card that I have peeking out of the photo mat. The photo mat is 5 1/4" x 7 1/4". Click below to view my YouTube video:

Fifth Grade Scrapbook Layout (Boy)

Image
Here is a fifth grade layout I did for my niece and great nephew. I used paper from K Company and a Creative  Scrappers sketch # 261 by Kristine Davidson. The red layer is 7" x 9". The strips are 1/2" x 8 1/2". The banners are 7.70" x 1 1/2" and are cut using the Silhouette. I cut this from the 8" x 8" Mambi paper pad from Me & My Big Ideas for my title.  I used a corner rounder punch to round the corners. I cut a small strip of a green pattern and used the notebook border punch. I have a cluster of stickers that I used from Reminisce die cut sticker sheet. This is a cluster of stars that I put at the bottom right of the layout. The stars are Reminisce die cut stickers. I also cut another small green strip and punched with notebook border punch and put at the bottom of the layout. I used a school project life journaling card. It fits under the photo mat. The photo mat is 5 1/4" x 7 1/4". Click

Here and Now Scrapbook Layout

Image
This layout I did for my bulldog Hoss. I used my Silhouette for all the cuts. I used a Creative Scrappers sketch #268 by Jenny Gevans. Here is a look at the top three circles. All the circles are 2 1/2"and cut using the Silhouette. Here is a look at the bottom three circles together. This circle has a 2" Fancy Pants "Hello/Hi" speech bubble. I made and offset, but set it to zero because I only want the creme paper to show through the words. When I did the offset, I did have to ungroup the offset and delete the word "Hello" off the offset. Here is a closeup of my bulldog Hoss. What a cutie like his sisters Roxy and Coco. This circle houses the ampersand. It is from the  You & Me banner in the Silhouette store. I ungrouped everything and deleted everything but the ampersand. I did some stitching at the bottom and added three different colored enamel dots. These triangles I made using the free hand tool in the Silho

Fourth Grade Scrapbook Layout (Boy)

Image
I have made a fourth grade layout for my great nephew. I used papers from K Company and Second Wind Collection. I cut a circle background from my Silhouette. There is a blue layer behind the photo mat that is 6 3/4" x 8 3/4". Let's look below for further details about this layout. Here is a cluster of stickers at the top of the layout. I have my title and I like how it looks if you cluster other stickers near the title. All stickers are from Reminisce die cut sticker sheet. I have set behind the circle background a school project life card. Here is another cluster of stickers at the bottom right of the layout. The stickers are also from Reminisce die cut sticker sheet. I have cut two strips and placed along side the photo mat on the left side of the layout. The orange strip is 3/4" x 11" while the aqua strip is 3/4" x 10". I cut a circle and put behind this cluster. The circle is 2 1/4" from the Silhouette. I used s

Third Grade Scrapbook Layout (Boy)

Image
Here is the third grade layout I did for my great nephew and my niece. I used a sketch from Creative Scrappers sketch #3 by Aphra Bolyer. I used paper from K company. The aqua pattern behind  the photo mat is 6 1/4" x 10 1/4" and the orange floral patterned layer is 8" x 5".  I cut 2" circles using my Silhouette Cameo. Let's look below for more details about this layout. Here is my title using Reminisce die cut stickers. I also put stars near the title. Behind the title I added two pencils and stars from the Reminisce die cut sticker sheet. I used an elementary school sticker as a subtitle. I also added a notebook and pile of books along with some stars from the Reminisce die cut sticker sheet to tie it all together. Photo mat is 5 1/4" x 7 1/4". Click below to view my YouTube video:

Second Grade Scrapbook Layout (Boy)

Image
This is the second grade layout I made for my great nephew. I used a lot of patterned papers from my scrap drawer. I also used cardstock and patterned papers from my stash, so I no longer know where they came from. Here is the title sitting upon a ruler that came from  the Reminisce die cut sticker sheet. I cut this circle at 3" using my Silhouette and then I sewed around the circle purposely giving it a messy look. The patterned paper came from a school 8" x 8"  paper pad by Me & My Big Ideas.  This top cluster is made using Reminisce die cut sticker sheets. I cut these strips at 1" x 2" and placed them evenly going to down the  left side of the page. There are 5 strips in each row going across. This photo mat is double matted. The bottom mat is 5 1/2" x 7 1/2" and the top mat is 5 1/4" x 7 1/4". This is a project life card from the school kit. It easily slides in and out behind the photo mat.